The Importance of Website Performance & Loading Speed
Having the best content on your website is undoubtedly important. However, when it comes to search engine rankings, website performance can make or break your online presence. A website’s performance speed can be influenced by various factors, including poor servers, too many plugins, and slow connection speed. However, one common culprit that is often overlooked is images. When images are large and take too long to load, they can slow down your website and affect your search engine rankings. Therefore, addressing image sizes and optimising them becomes crucial in ensuring faster load times for better search engine results.
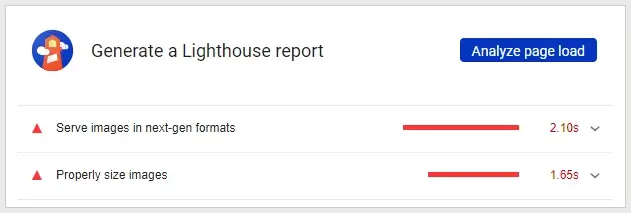
Images are often highlighted by Google as an area that needs improving when running a Google Lighthouse website report.
JPEG has always been the go-to image format for website images. However over the years, a new format has been on the rise. Which can help with search engine ranking and website performance, called WebP.
What is WebP?
WebP stands for Web Picture format, and is a modern image format developed by Google that compresses images to a smaller file size without compromising on quality. According to Google, it’s primary intention is to replace JPEG, PNG and GIF as the industry-standard web image format.
What Are the Advantages of WebP?
- WebP images are on average, 25-34% smaller than JPEG images
- WebP images are on average, 26% smaller than PNG images
- WebPs are on average, 64% smaller than GIF images
- WebP combines the quality of JPEG, transparency of PNG, and animations of GIF, making it the all-in-one image format for web use
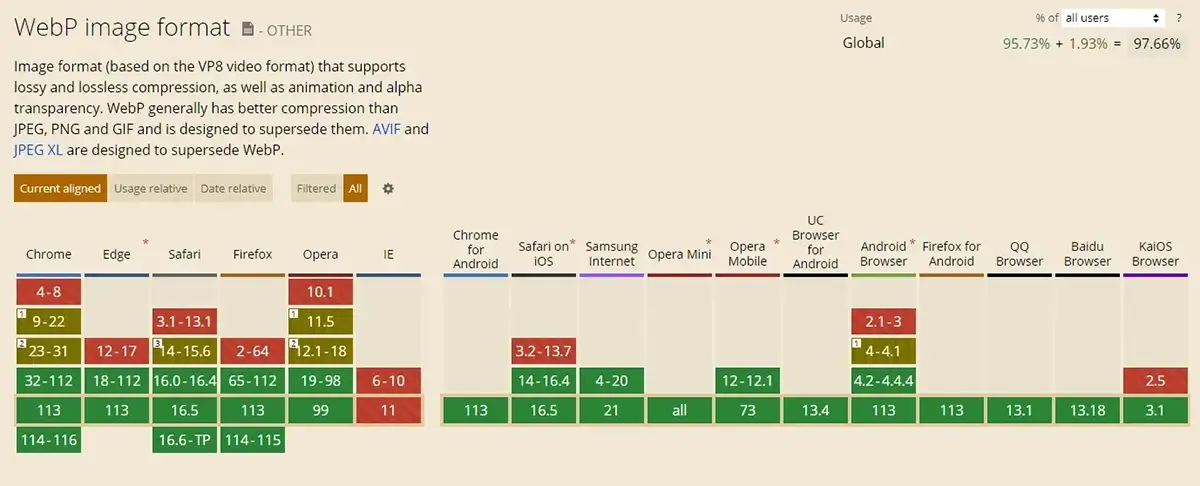
- WebP is supported by all popular browsers, including Chrome, Firefox, Edge, and Safari
How to Save Images as WebP
Unfortunately, saving your images isn’t as straightforward as JPEG just yet, as popular free graphic editors such as Microsoft Office Picture Manager and Paint do not currently offer you the option to save images as WebP. However, you can still easily save your images as WebP by doing one of the following.
Convert JPEG Into WebP
Adobe Photoshop
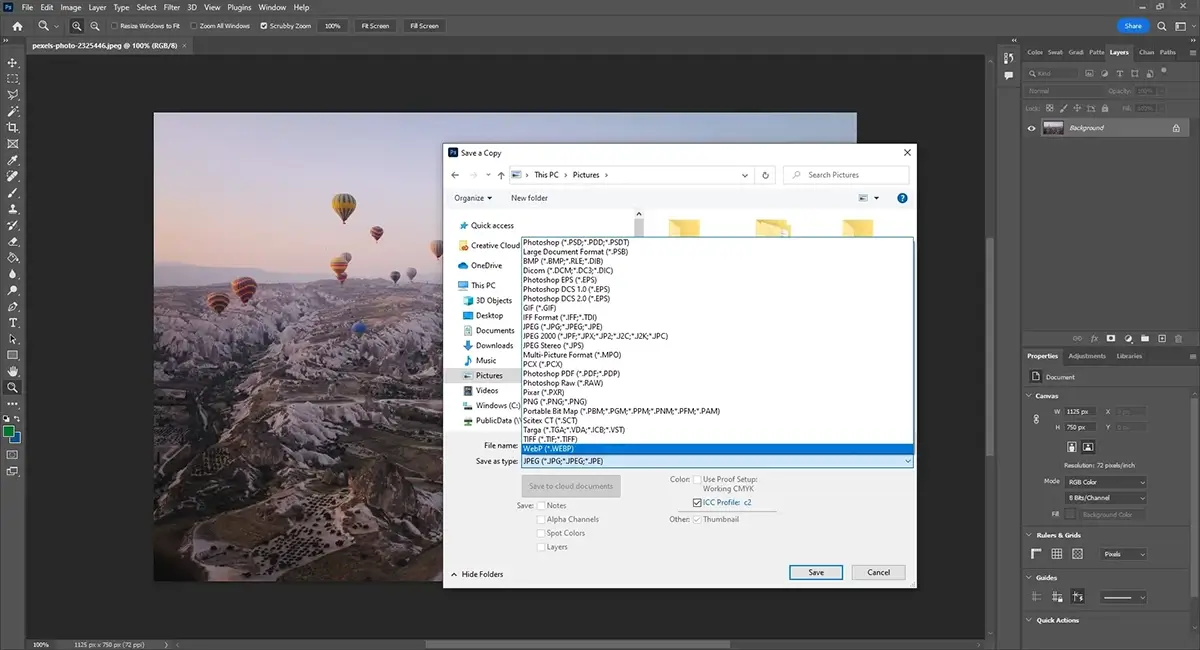
If your lucky enough to own Adobe Photoshop, then you can simply:
- Open your image
- File > Save As…
- Save as type
- select WebP (*.WEBP)
Online
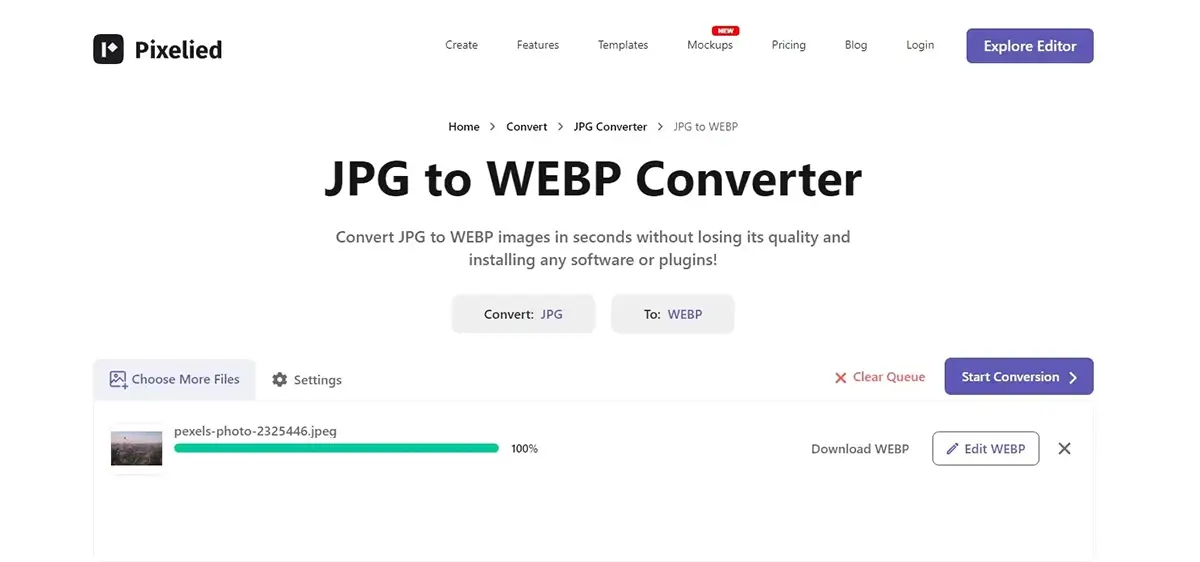
Search Google or any other search engine for ‘JPEG to WebP converter’. This will provide you with several websites that can convert JPEG to WebP. My preferred choice is Pixelied because it’s free and doesn’t have a limit on the number of images you can convert at the same time.
To convert an image on Pixelied, go to:
- Features > Image Converter.
- Under ‘Convert’, select the current image file type (most likely JPG).
- Under ‘To’, select WebP.
- Press ‘Choose Files’ to select your image.
- Click ‘Convert to WEBP’.
- Once the conversion is completed, select ‘Download WEBP’ for your image in a WebP format.
How to Further Reduce File Size
Once your images are converted to WebP, you’ll notice faster website load speeds and improved search engine rankings. However, it’s crucial to consider two additional factors: using the correct image sizes and applying image compression. Ensuring that images are sized and compressed correctly will not only significantly enhance website performance but also further contribute to better search engine results.
The Correct Image Size for Websites
When you take an image on your phone or a professional camera, the size of your image will likely be around 4080px width x 3072px height. For website usage, this size is much larger than what is needed. The correct image size for your website depends on the specific use and placement of the images. However, over the years, two commonly accepted image sizes have emerged, which are suitable for mobile, tablet, and desktop devices. These sizes are:
- 1920px width x 1080px height for banner images
- 1200px width x 630px height for images used alongside text
How to resize WebP images
Adobe Photoshop
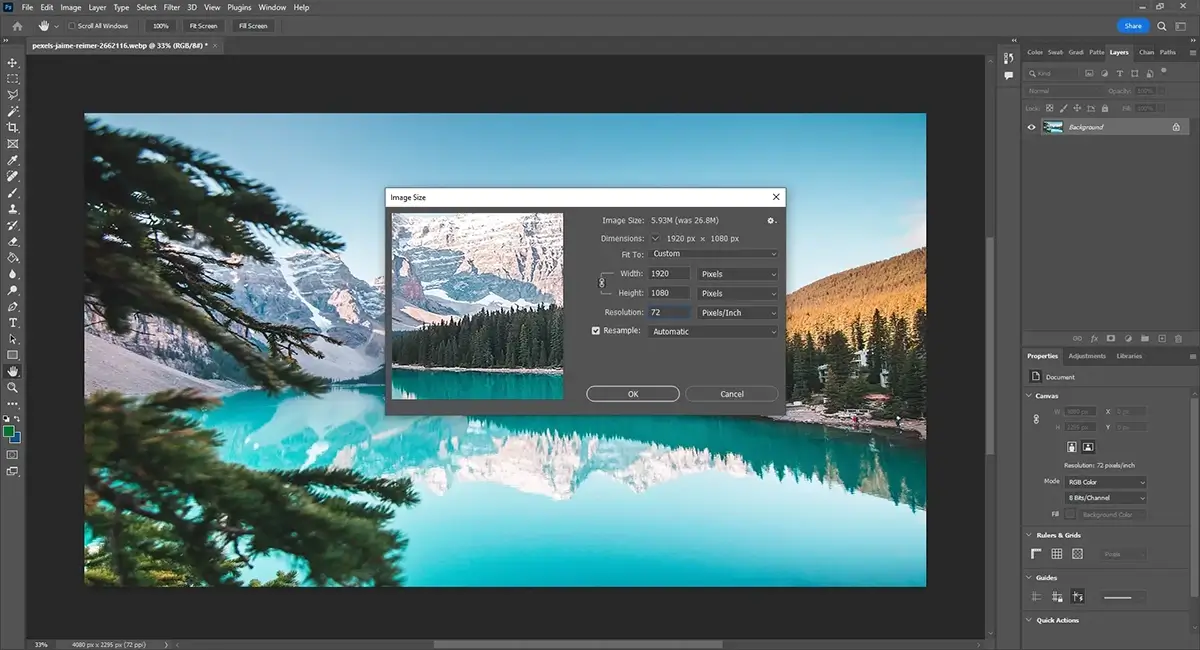
Similar to converting JPEG to WebP. If your lucky enough to own Adobe Photoshop, then you can simply:
- Open your image
- Image > Image Size
- Change Width and Height to desired size
Online
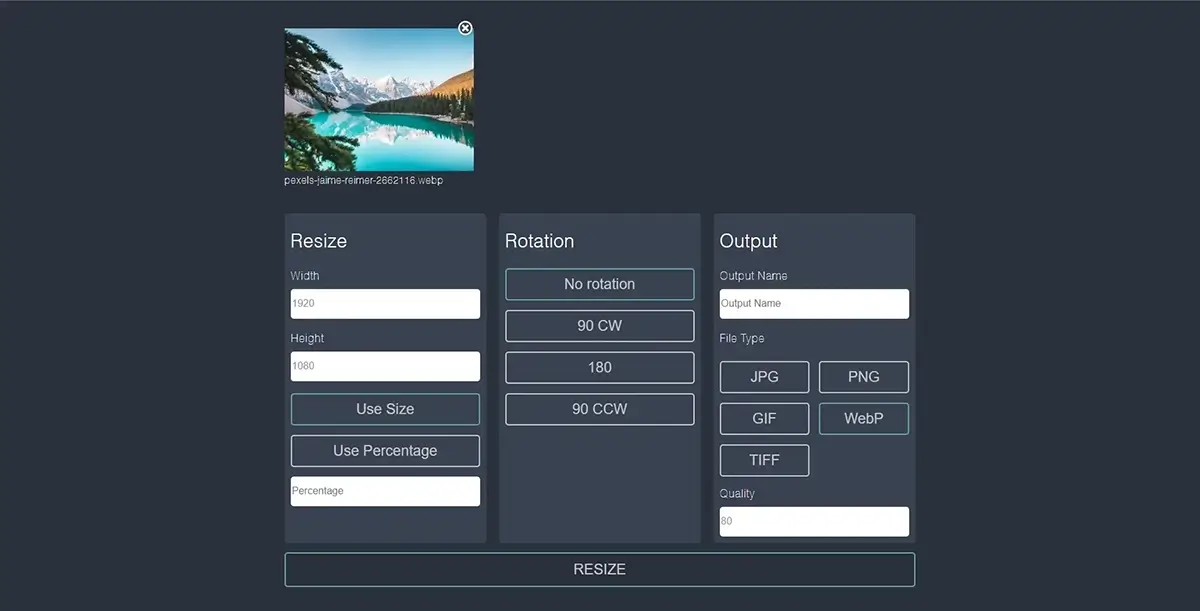
Search Google or any other search engine for ‘resize WebP images’. This will provide you with several websites that can resize WebP images. My preferred choice is Image Resizer Online because it’s free and easy to use.
To resize a WebP image, first:
- Select the large folder icon and upload your image.
- Insert your desired width and height size.
- Under Output File Type, select WebP.
- Select RESIZE.
- Once resizing is complete, it will automatically download into your downloads folder.
Resize your JPEG image before converting
A simpler alternative is to use a free graphic editor to resize your image before converting it to WEBP. However, if you decide to resize your image again in the future, you would need to resize it and then convert it each time. Which is why I don’t suggest this method.
Compress Your Images for Optimal Speed & Performance
The final step to achieve optimal website speed and performance is to compress your WebP images to reduce their file size. Unlike conversion and resizing WebP images, I do not recommend using Adobe Photoshop for this purpose. This is because Adobe Photoshop is primarily designed for print materials, meaning it saves images in the highest quality to ensure optimal print results. This high-quality output is not suitable for web usage.
How to compress WebP images?
Online
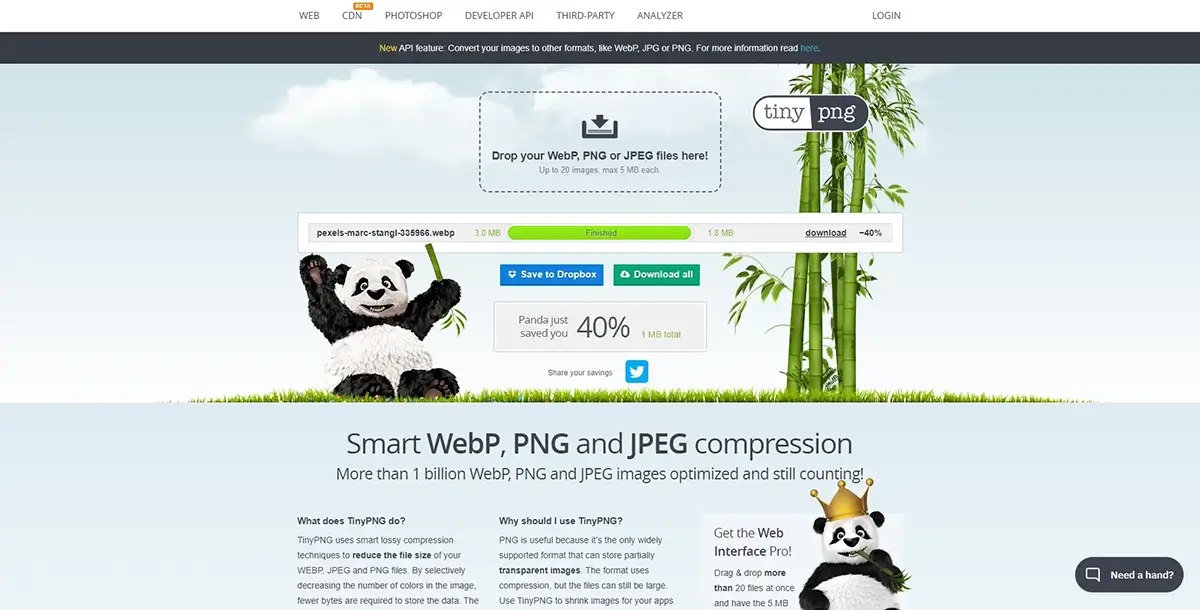
Search Google or any other search engine for ‘WebP Compressor’. This will provide you with several websites that can compress WebP images. My preferred choice is TinyPNG because it’s free, you can compress up to 20 images simultaneously, and it features a cute panda as its mascot.
To compress a WebP image, first:
- Select Drop your WebP, PNG or JPEG files here!
- Select your image(s)
- TinyPNG will automatically begin compressing your image
- Next to the green bar labelled Finished, select download. Your compressed image will automatically download into your downloads folder.
Final Thoughts
In conclusion, using WebP image format for your website offers numerous advantages over traditional formats like JPEG, PNG, and GIF. By converting your images to WebP, you can enjoy faster website load speeds, improved user experience, and higher search engine rankings. However, it’s equally important to pay attention to correct image sizes and effective image compression techniques.
Although converting, resizing, and compressing WebP images currently require additional steps and time, the growing popularity of WebP is likely to lead to increased support in popular free graphic editors. As more tools and platforms embrace WebP, it will become easier and more convenient to work with. However, there’s no need to wait until then. Start using WebP now to optimise your website’s performance, knowing that the future holds even greater support and benefits for this modern image format.


One Comment