Introduction
When submitting artwork for print, it’s common for printers to request specific setup details. These requirements help avoid delays, reprints, and unexpected results. Here are four of the most common things printers ask for — and why they matter.
CMYK Colour
Printers work in CMYK, not RGB. RGB is used for screens and digital displays, while CMYK is the colour model used for printing. Supplying artwork in CMYK helps ensure colours print as expected, allows you to see more accurate print previews, and avoids unexpected colour shifts between screen and paper.
How to Change Images to CMYK
Adobe Photoshop
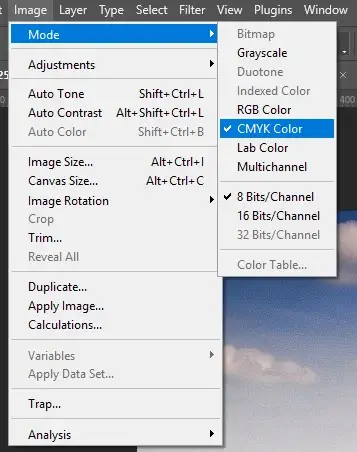
If you own Adobe Photoshop, then you can simply:
- Open your image
- Image > Mode
- Select CMYK Color
- Save image.
Online
Search Google or any other search engine for ‘convert rgb image to cmyk’. This will provide you with several websites that can change images to CMYK. CMYK Tool is free and easy to use.
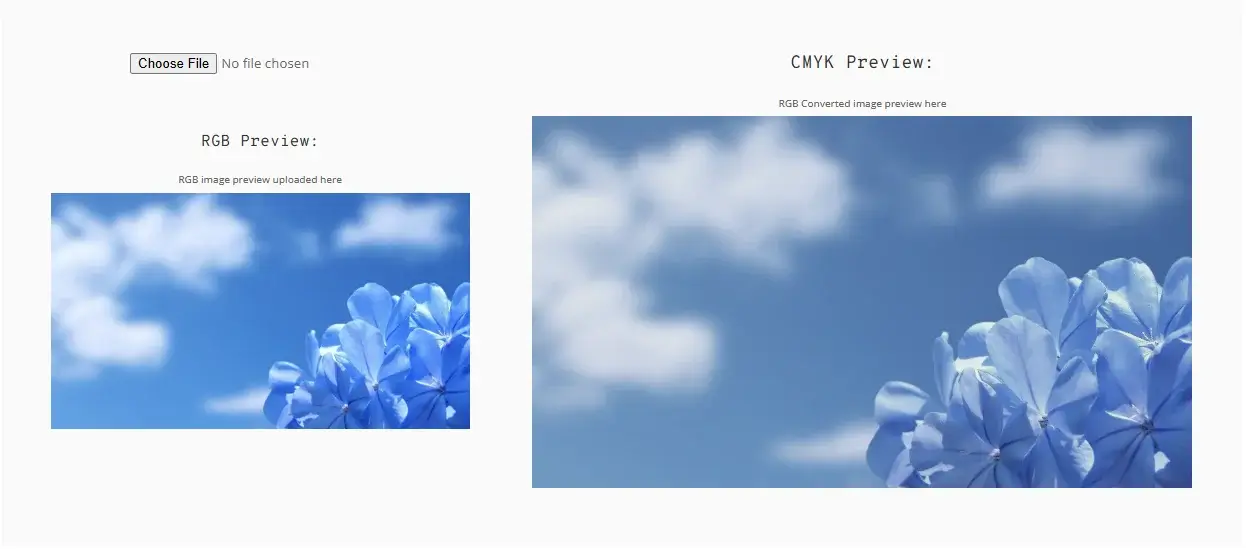
How to use:
- Scroll down until you see two images of the same thing
- Select Choose File
- Upload your image
- You will now see a CMYK Preview of your image
- Select Download CMYK Image above the image.
300dpi Images
DPI (dots per inch) refers to the resolution of an image when printed. Images are often set to 72dpi, which is suitable for screens but not for print. For sharp, professional results, images should be set to 300dpi to prevent pixelation and ensure your artwork prints crisp and clear.
How to Update Images to 300dpi
Adobe Photoshop
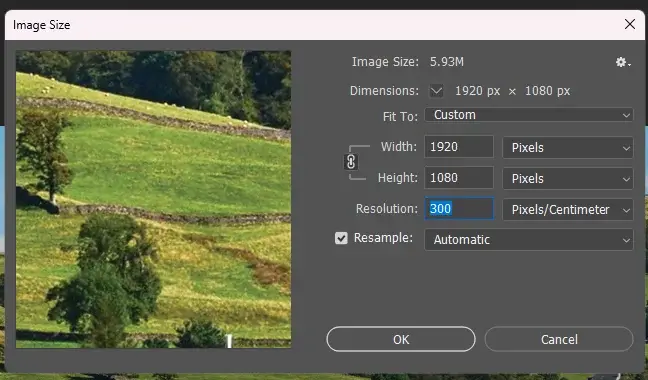
If you own Adobe Photoshop, then you can simply:
- Open your image
- Image > Image Size
- Change Resolution to 300
(This will also change the width and height of your image, but personally I would keep them as they were.)
Online
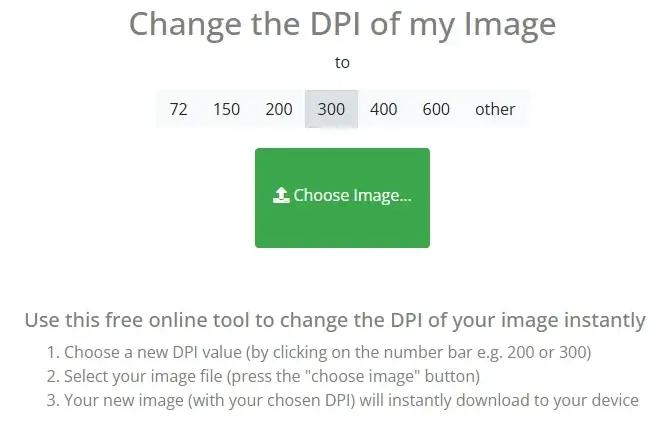
Search Google or any other search engine for ‘convert image to 300dpi’. This will provide you with several websites that can update images to 300dpi. Convert Town is free and easy to use.
How to use:
- Make sure 300 is selected above the Choose Image button
- Select Choose Image and upload your image
- Your image will update and download automatically.
Bleed
Bleed ensures your design extends slightly beyond the final trim size, usually by 3mm. This prevents unwanted white edges from appearing once the artwork is cut, which can make it look like it’s been printed at home rather than professionally.
How to Add Bleed
Adobe InDesign
If you own Adobe Photoshop, then you can simply:
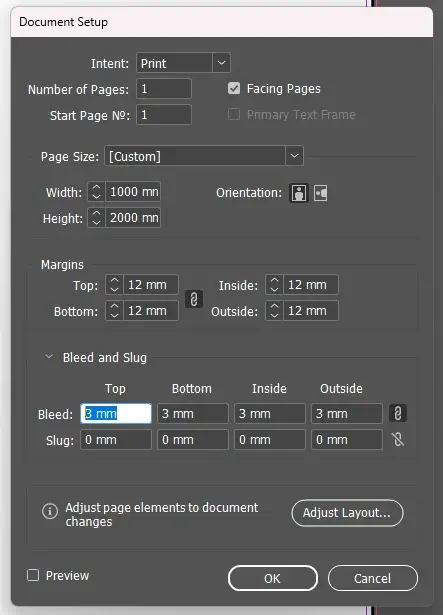
- File > Document Setup…
- Select the > arrow next to Bleed and Slug to show more options
- Change The Bleed option to 3mm for all sides
(Most standard print work will only require 3 mm bleed. Larger artwork might require more.) - Select OK. This will put a red bleed line around your document
- Make sure any background images or colours extend all the way to the red line, not just the white part of the document
- When ready to print, File > Export
- Save Your File
- Select Marks and Bleeds
- Under Marks, tick All Printer’s Marks
- Under Bleed and Slug, make sure Use Document Bleed Settings is also ticked.
Canva
A good alternative to Adobe Photoshop is Canva, which is online and easy to use. To add bleed, simply:
- File > Settings > Show print bleed. This will add a line around your document, along with some extra white space
- Make sure any background images or colours extend all the way to the edge of the document. Anything beyond the line will be cut, so keep text and important images inside the line
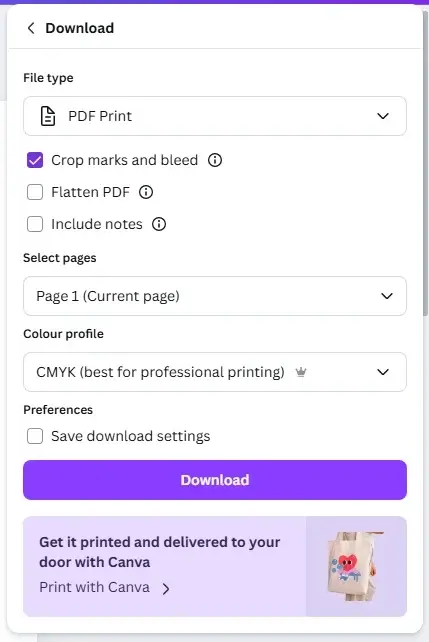
- When ready for print, File > Download
- Under File type, select PDF Print
- Make sure Crop marks and bleed is ticked
- For CMYK artwork, you can also, under Colour profile, select CMYK (best for professional printing)
- Select Download.
Fonts Embedded
Embedding fonts helps make sure your text prints as intended. Without embedded fonts, they can be replaced, which may affect how your design looks and reads. Honestly, the best way to avoid font issues is to keep things simple and readable, using common font types such as Helvetica, Arial, or Times New Roman.
Final Thoughts
Getting these basics right helps streamline the print process, ensures your final product looks as good on paper as it does on screen, and helps avoid costly reprints or wasted money.


